
Using an Azure Web App to host multiple static html sites
There are a lot of static site generators around and I have been using quite a bunch of them. While I used most of them for this (personal) blog, I have also used some for professional purposes like documenting software and for team and company-wide documentation. Especially Sphinx has proven itself to be quite useful.
I want to create an environment with the following requirements:
- Hosting in an Azure Web App
- Protected by Azure Active Directory
- Every project has it’s own documentation (no merge conflicts between teams)
- Use Sphinx but using other generators is possible
In this post I will show how to create a documentation platform which implements the requirements above with only a few lines of code.
Before we get started a few remarks: I am using Linux containers and a Linux development environment. The commands I run are thus formatted in a Linux format. If you use Windows you might need to change the commands I execute.
Also some prerequisites:
To understand this article I expect you to have a general understanding of:
- Azure Web Apps
- Azure Storage Account
- Azure DevOps
Azure Web App and Storage Account
To get everything working we need a functioning Web App with a Storage Account. After configuring the storage account we need to configure a file share and mount it inside the Web app:
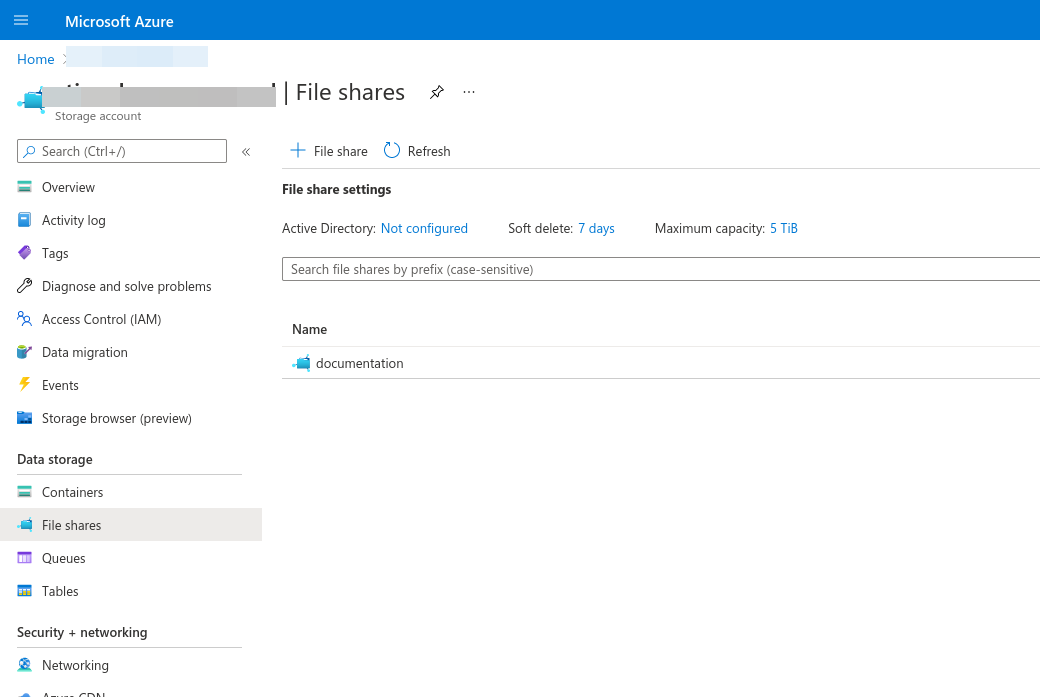
Click on + Share, enter a name and store the share.
The next step is to mount the share inside the web application, something I would normally do with either Terraform or in a release pipeline but it can also be done with the Azure Cli tool az:
az webapp config storage-account add \
    --resource-group <Resource Group Name Here> \
    --name <Web App Name Here> \
    --storage-type AzureFiles \
    --share-name documentation \
    --account-name <Storage Account Name Here> \
    --access-key <Storage Account Access Key Here> \
    --mount-path "/documentation" \
    --custom-id documentation \
    --verbose --debug
After running this command the share will be mounted as /documentation, in the root of the application thus outside the wwwroot!
You can verify the existence of the mount by running the following command:
az webapp config storage-account list \
   --resource-group <Resource Group Name Here> \
   --name <Web App Name Here>
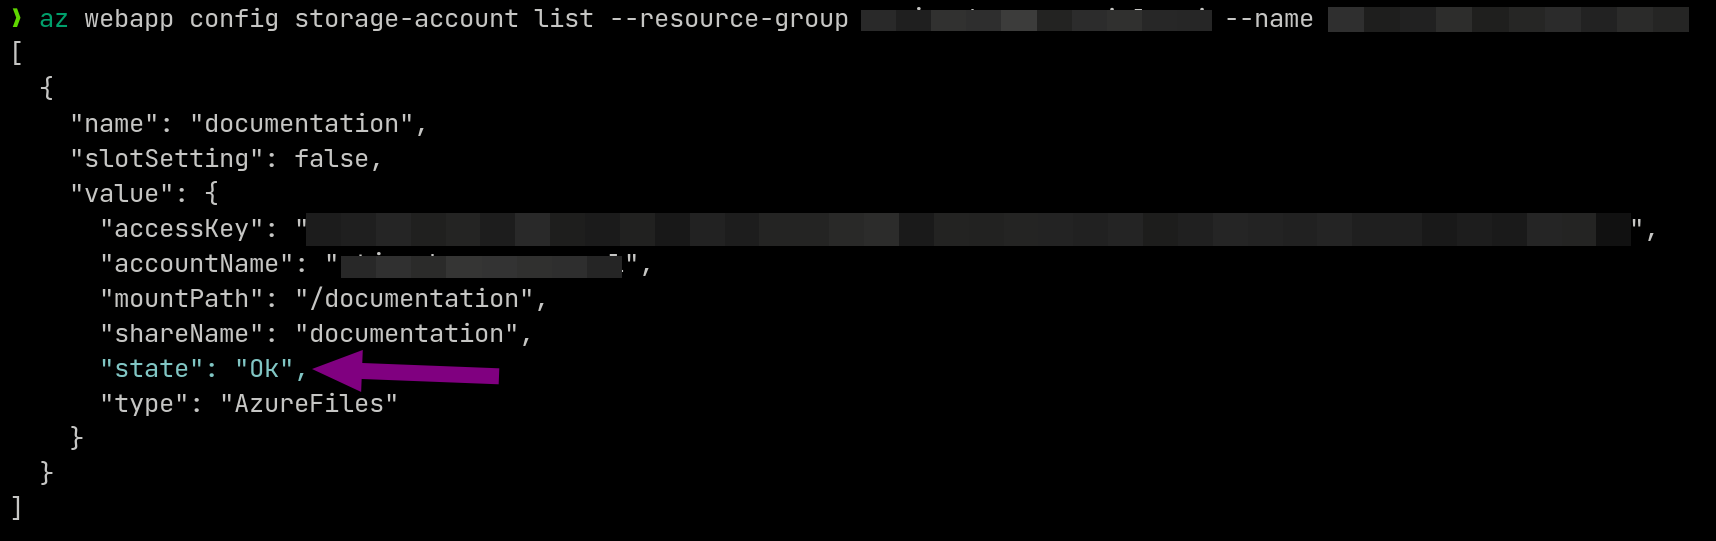
The state property is important, it will tell you if the disk is mounted successfully.
Generating static HTML
I won’t get into the details of setting up a Sphinx documentation platform as this is not the purpose of this post. You could use any kind of static site generators (e.g. Hugo, Jekyll, Gatsby or Sphinx.
After generating the static HTML you need to push the content to the file share of the Blob Storage. I added the following step in my Azure DevOps pipeline:
- task: AzureCLI@1
  displayName: Az File Copy to Storage
  inputs:
    azureSubscription: 'azure-devops-access'
    scriptLocation: 'inlineScript'
    inlineScript: |
      az storage file upload-batch \
              --account-name "<Storage Account Name Here> \
              --destination https://<Storage Account Name Here>.file.core.windows.net/<File Share Name Here> \
              --destination-path some-fake-project \
              --source ./source
After running this step the documentation will be available at https://storageaccountname.file.core.windows.net/share/some-fake-project/.
Minimal Web App (.net6)
To me, this was the most interesting step. All other steps are more or less Operations tasks and this part is going to involve some actual development. I like to use some of the latest tools if possible so I thought it might be a nice opportunity to start with .NET6 with a minimal Web App. I didn’t count the lines of code I had to type but I guess it is less than 20!
Let’s get started:
The Program.cs:
using DocumentationRootApplication.WebApp;
using Microsoft.AspNetCore.Builder;
using Microsoft.Extensions.DependencyInjection;
using Microsoft.Extensions.FileProviders;
using Microsoft.Extensions.Options;

var builder = WebApplication.CreateBuilder(args);
builder.Services
    .Configure<DocumentationSettings>(builder.Configuration.GetSection(nameof(DocumentationSettings)))
    .AddRazorPages();

var app = builder.Build();
var documentationSettings = app.Services.GetRequiredService<IOptions<DocumentationSettings>>();

app.UseStaticFiles(new StaticFileOptions
{
    FileProvider = new PhysicalFileProvider(documentationSettings.Value.RootPath),
    RequestPath = $"/{documentationSettings.Value.RequestPath}"
});

app.MapRazorPages();
app.Run();
The UseStaticFiles is probably the most interesting part. It specifies the folder (FileProvider) and the (relative) path on which the files should be available. I used documentation as the request path so all documentation folders will be available under https://some.site/documentation/foldernamex.
The html page `Pages/Index.cshtml’, I kept it minimal (just because I suck at designing):
@page
@model DocumentationRootApplication.WebApp.Pages.Index

<!DOCTYPE html>

<html>
<head>
    <title>Index</title>
</head>
<body>
<div>
    <ul>
        @foreach (var link in Model.Pages)
        {
            <li>@Html.Raw(link)</li>
        }
    </ul>
</div>
</body>
</html>
The code-behind, Pages/Index.cshtml.cs:
using System.Collections.Generic;
using Microsoft.AspNetCore.Mvc.RazorPages;
using Microsoft.Extensions.Options;

namespace DocumentationRootApplication.WebApp.Pages
{
    public class Index : PageModel
    {
        public List<string> Pages { get; private set; }

        public Index(IOptions<DocumentationSettings> documentationSettings)
        {
            Pages = new SiteListGenerator().GenerateDocumentationLinks(
                documentationSettings.Value.RootPath,
                documentationSettings.Value.RequestPath);
        }
    }
}
And, finally, the actual directory listing, SiteListGenerator.cs:
using System.Collections.Generic;
using System.IO;
using System.Linq;

namespace DocumentationRootApplication.WebApp
{
    public class SiteListGenerator
    {
        public List<string> GenerateDocumentationLinks(string path, string requestPath) =>
            Directory.EnumerateDirectories(path)
                .ToList()
                .Select(item =>
                {
                    var name = new DirectoryInfo(item).Name;
                    return $"<a href=/{requestPath}/{name}/index.html>{name}</a>";
                }).ToList();
    }
}
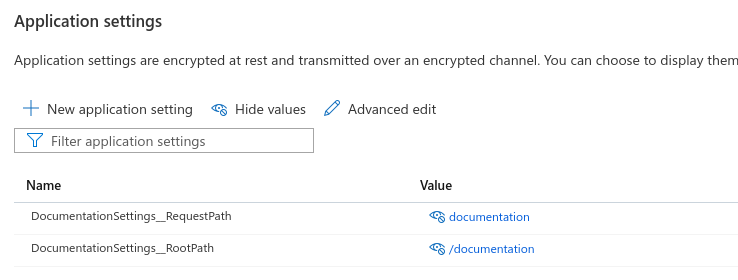
I added the following parameters in my appsettings.Development.json:
"DocumentationSettings":
{
    "RootPath": "/home/jacob/projects/devops/DocumentationPOC/documentation",
    "RequestPath": "documentation"
}
I also added the same variables in the Azure Web App:
Protecting the documentation with Azure Active Directory
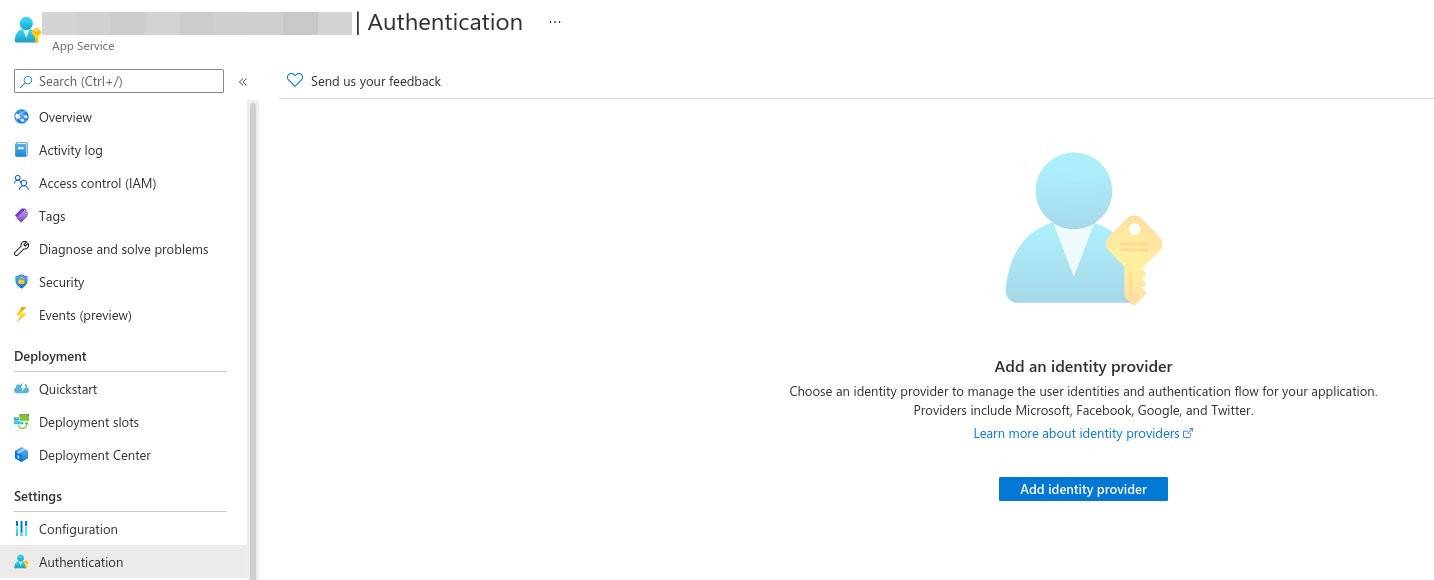
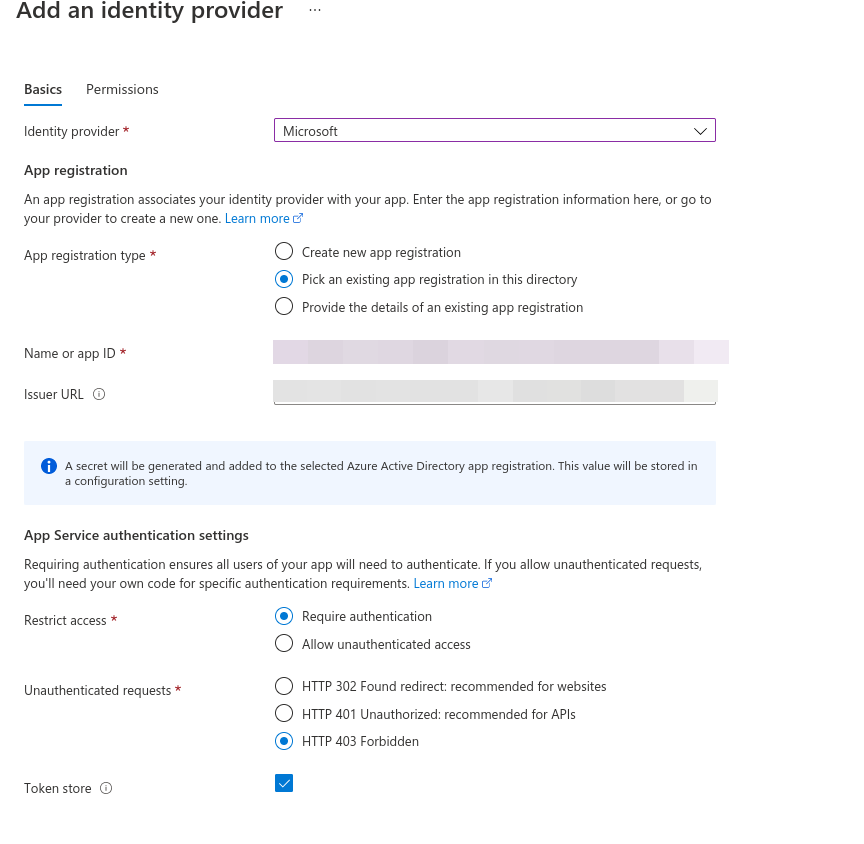
Protecting an Azure Web App is easy, especially when you are already using Azure Active Directory. I only add some screenshots here, you can find more information about securing your Web App here.
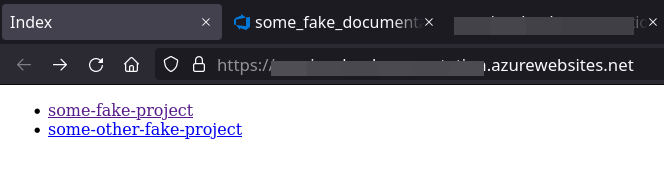
The final result
As I said before: I suck at designing so I created a clean HTML page only. When I am going to implement this proof of concept for real I will look for a designer to create a beautiful HTML design. For now, this is how it looks:
Next steps
There are some improvements I can think of:
- Creating a better user interface :)
- Adding the option to create sub folders. An empty directory with directories inside could be shown as
- folder
- documentation
- documentation
- folder
- It would be nice if it is possible to limit access to specific folders to certain Active Directory groups only
Anyway, I am happy with the current solution, will work on some of the improvements and hope some of you find this post helpful. Feel free to contact me if you have any question or suggestion!